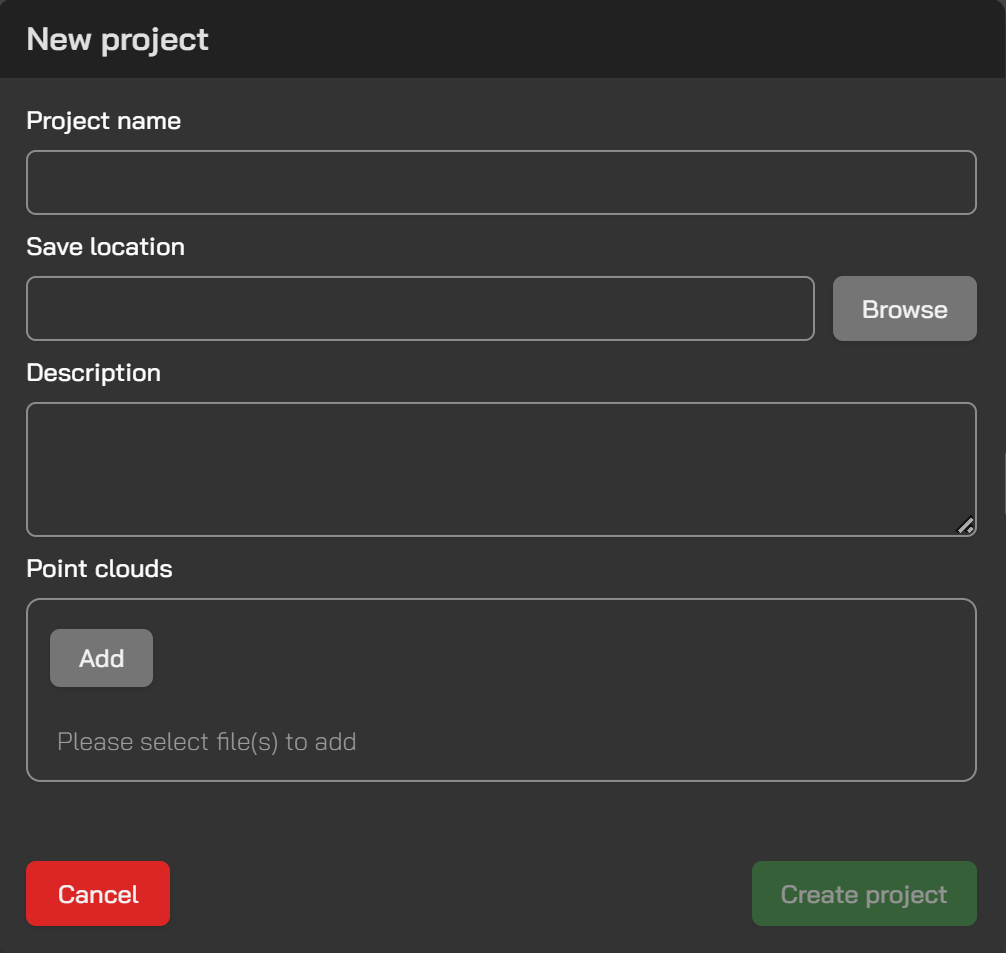
Multiple files can be selected within the Point Clouds section.
Open Project
Save Project
If there are unsaved changes in the active project, an asterisk (* ) will appear next to the project name at the top of the page, indicating that the project must be saved.
Export Point Cloud
The point cloud can be exported as a LAS file, including after cleaning, classification, or downsampling.
Deleted points will not be included in the exported LAS file.
Export 3D - Currently visible walls
In multi-storey projects, if 3D assets are visible for more than one storey, they will be exported together as a single IFC file.
When editing a space, only the 3D assets for that space can be exported as IFC. This allows multiple spaces to be exported into one file if desired.
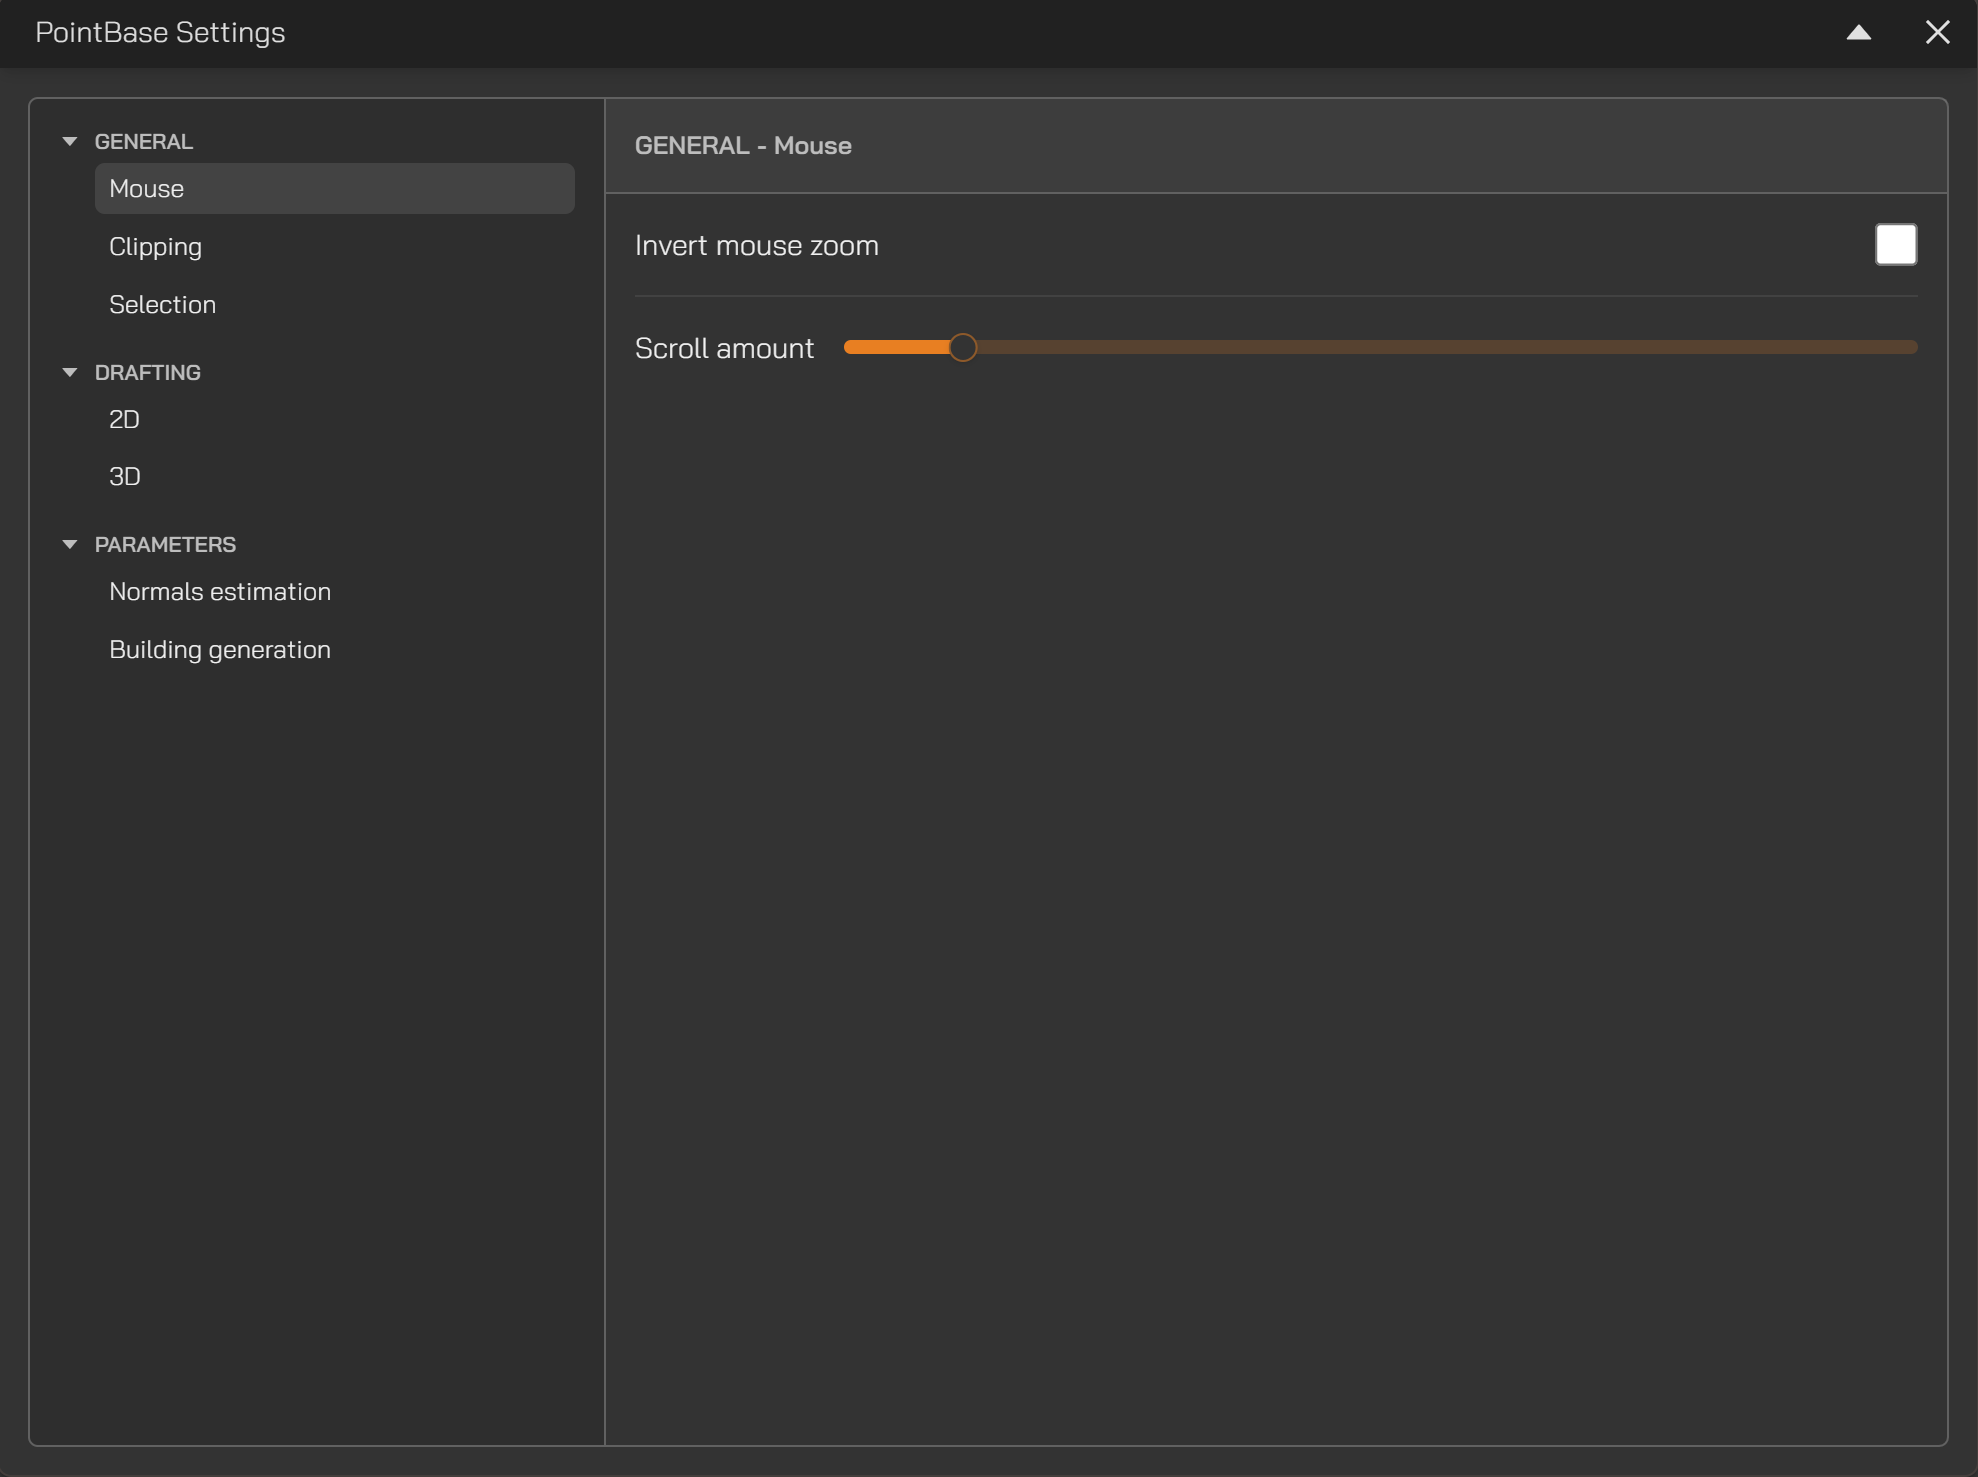
Application Settings
Access this page to adjust mouse actions, colour settings, and point sampling parameters.
View Panel
Whether normals are present in the point cloud.
To enable Normal Shading and X-Ray, the point cloud must contain surface normals.
If the project shows No in the normals status after creation, use Estimate Normals to calculate them.
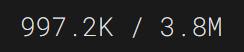
Number of points shown in the viewport vs. number of points loaded and available in the memory.
Reducing the number of visible points can improve performance during drafting.
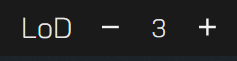
Level of Detail
Shows the level of detail (number of points) loaded for the active project.
The project will load using the last saved level of detail.
This value can range between 1 and the level of detail specified when the project was created.
Point Size
Increase / Decrease to adjust clarity.
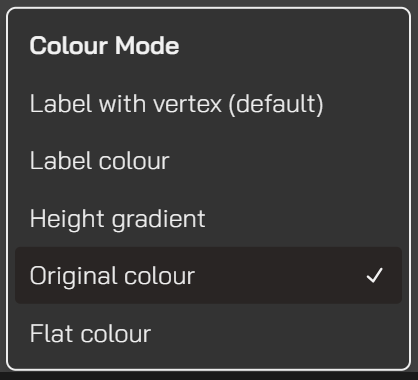
Change Colour Mode
Label with Vertex: Categorised points are displayed in their assigned category colour, while non-categorised points retain their original colour.
Label Colour: All points are displayed in their category colour. If no points have been assigned to any category, they remain in the Never Classified category and are shown in the colour assigned to that category.
Height Gradient: Applies a gradient based on elevation. Useful for point clouds without colour information.
Flat Colour: Renders all points in a uniform colour of choice. When combined with X-Ray, this can enhance visual clarity.
Enable / Disable Normal Shading
Uses surface normal vectors to create realistic lighting effects, making points that face the view direction appear lighter and those that are perpendicular appear darker. This enhances perceived geometry and depth, especially when colour information is absent.
Requires normals.
Enable / Disable EDL (Eye-Dome Lighting)
Uses depth information to apply subtle shading around object edges, creating a dome-like outline that significantly improves depth perception and visual detail.
Enable / Disable X-Ray mode
Makes points transparent or semi-transparent, allowing objects to be seen through and revealing internal structures or hidden details.
Enable / Disable Glow for X-Ray mode
Once enabled, increases the intensity of X-Ray mode.
Useful for visualising walls in plan view during drafting.
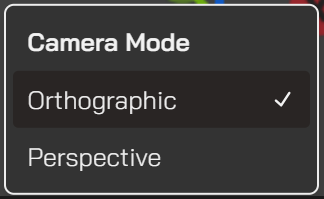
Change Camera Mode
Enter Walk Mode
🔍 Notes
W: Step forward
S: Step backward
A: Pan left
D: Pan right
Left arrow key: Look left
Right arrow key: Look right
Up arrow key: Look up
Down arrow key: Look down
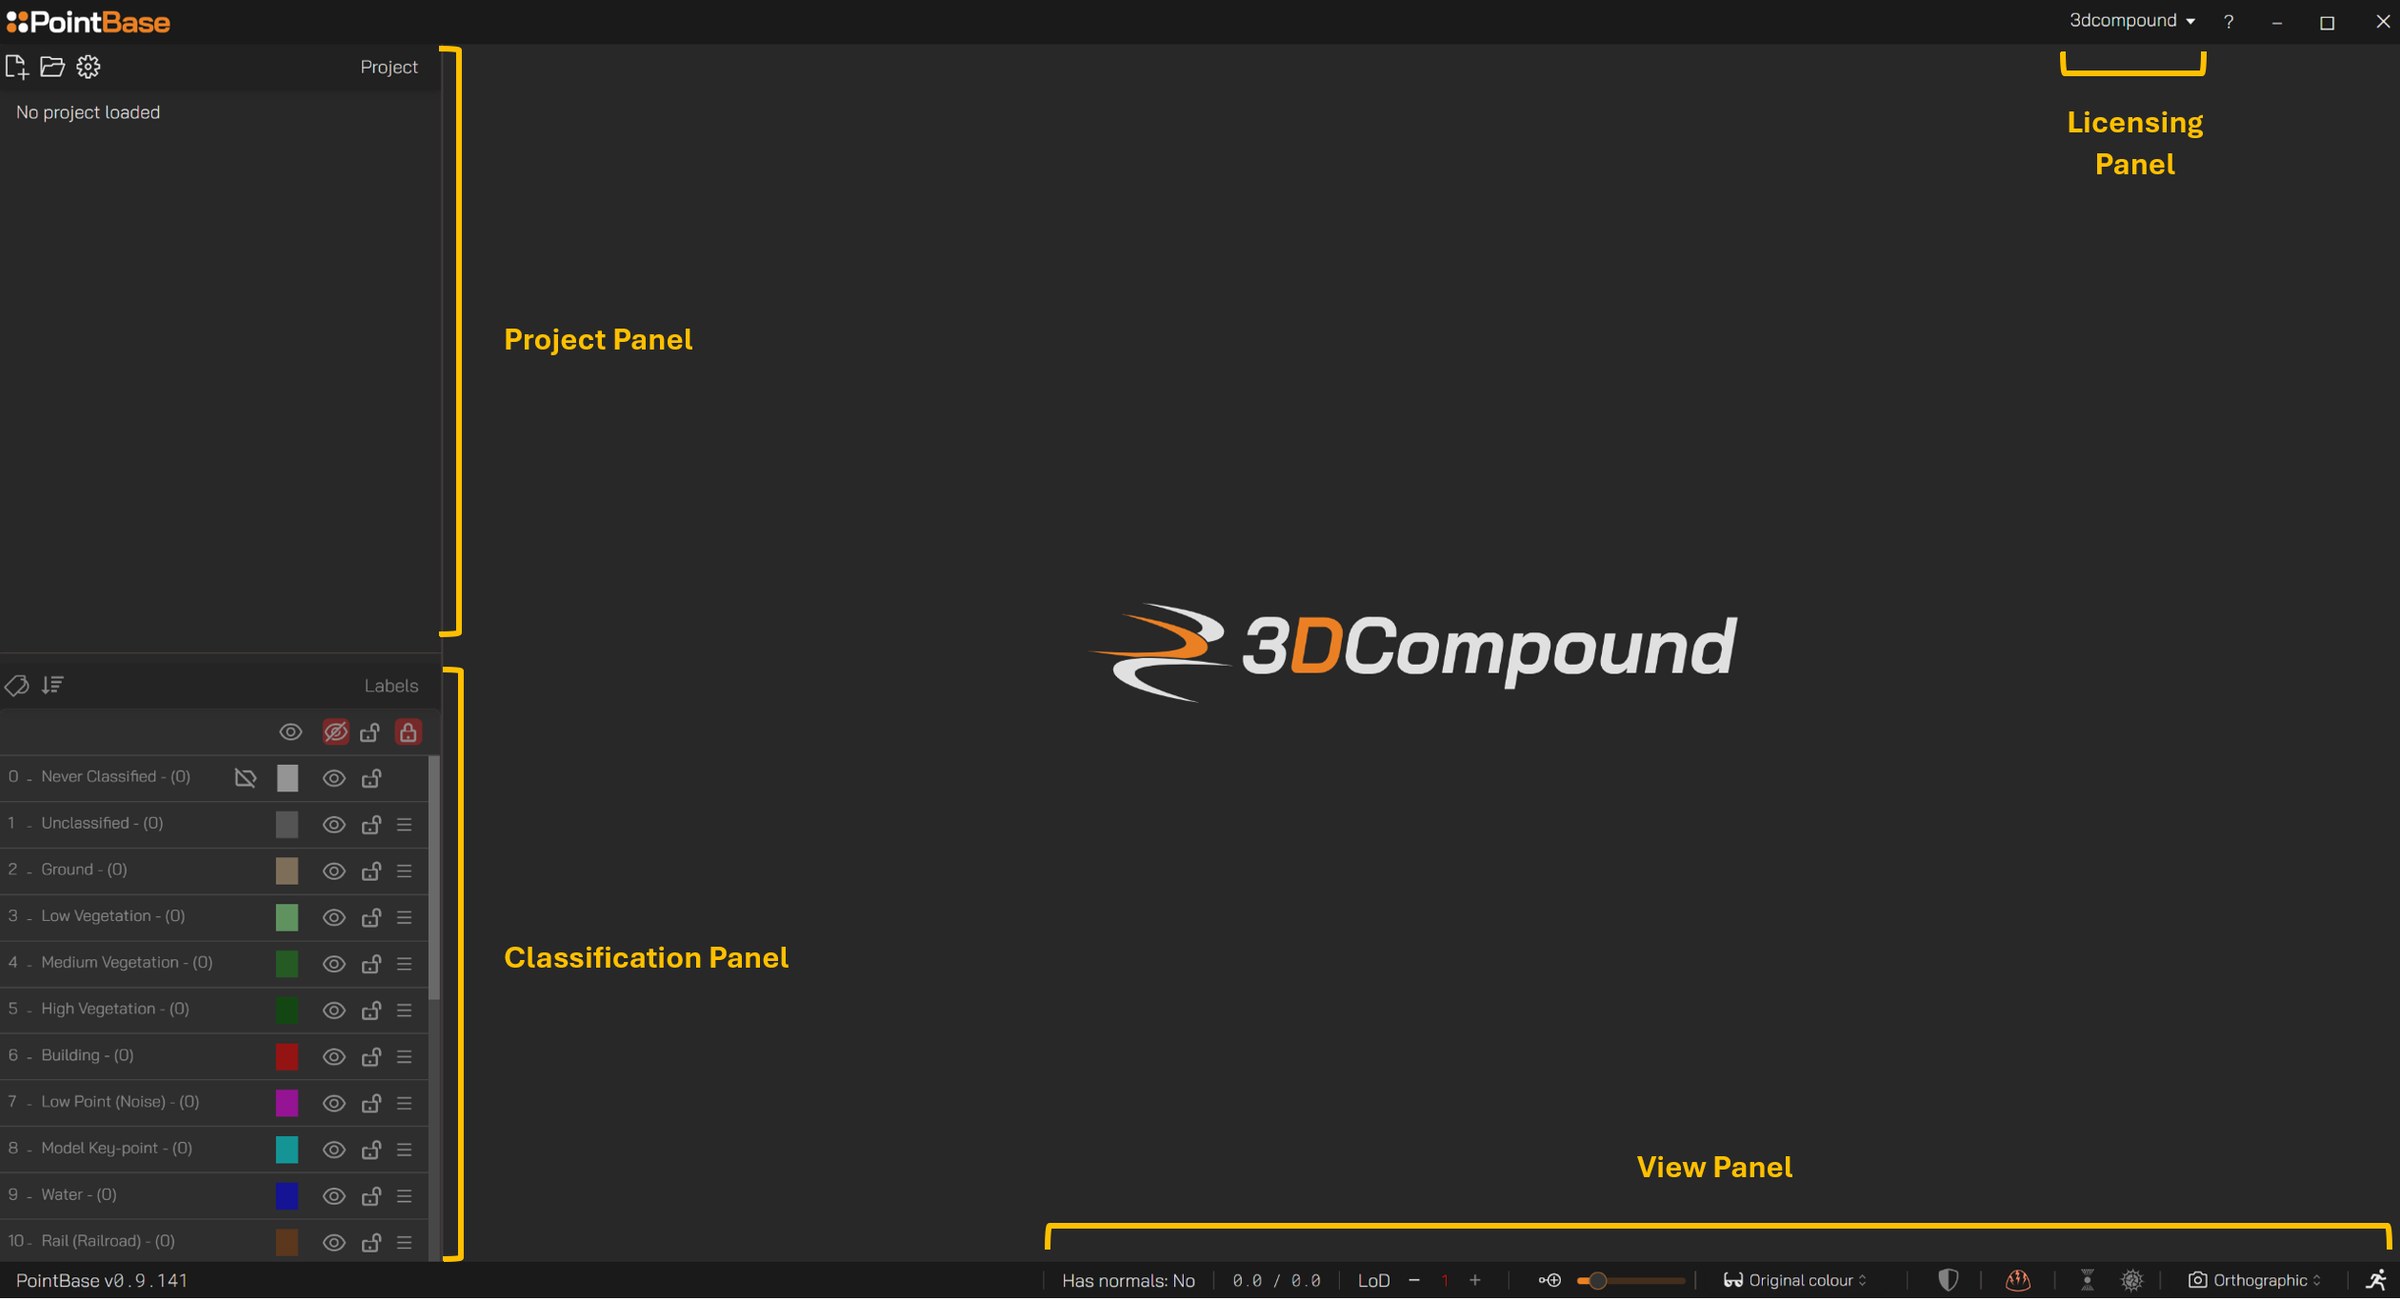
Licensing Panel
Using this panel you can
Access your online account
Activate or deactivate a license
Log in to PointBase
⚠️ An active account is required to use PointBase.